
Advent of Cyber 2025 – Day 7 Walkthrough
Question 1
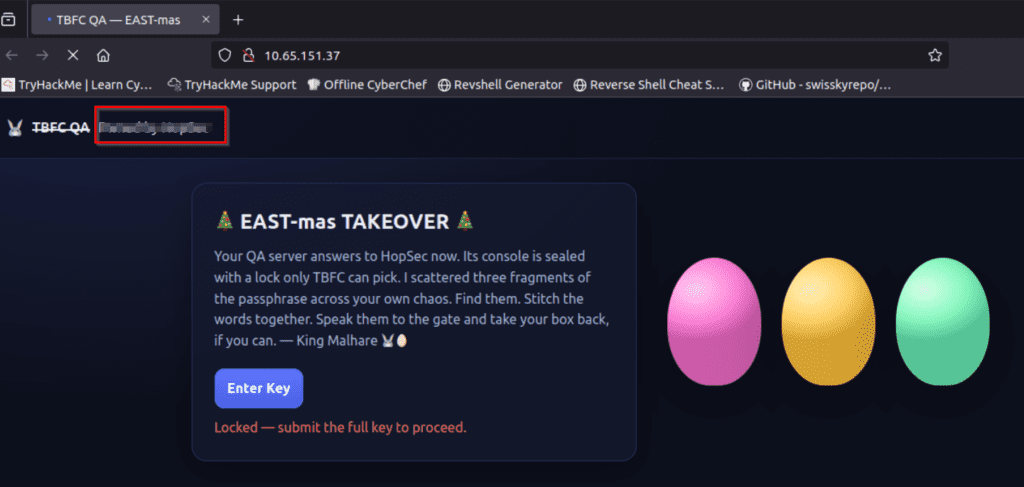
What evil message do you see on top of the website?
I always start active recon using nmap (or rustscan):
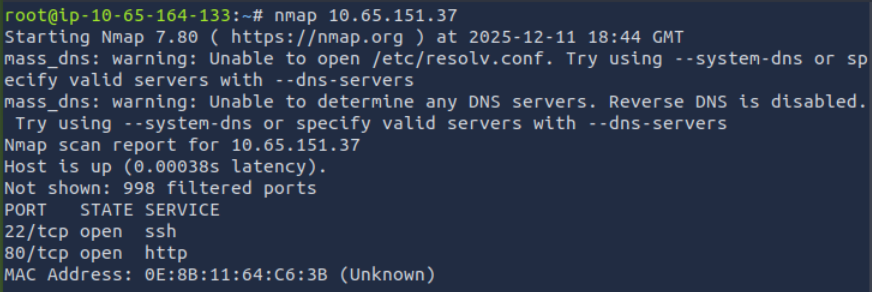
We can see two ports open: 22 and 80. With this scan, nmap makes a guess as to what services are running on those ports. It’s standard for SSH to run on port 22, and HTTP to run on port 80, although technically these services can run on any port (and an open port may have any service running on it). I will often start operating using the information from this initial port scan while running a more complete nmap TCP port scan using the -p- and -A options. In this case, I visited the HTTP server running on port 80:
Answer Hint:
The answer is on the top left of the page!
Question 2
What is the first key part found on the FTP server?
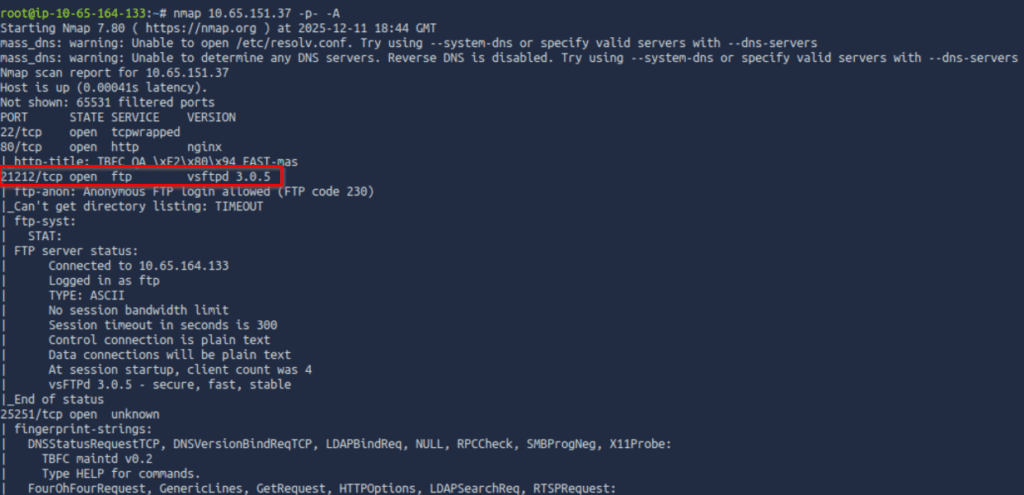
As mentioned, after running a quick nmap scan, I then perform a more in-depth scan against all TCP ports using the -p- option, and use the -A option to perform service version enumeration and run basic scripts.
This scan identified an FTP server running on port 21212:
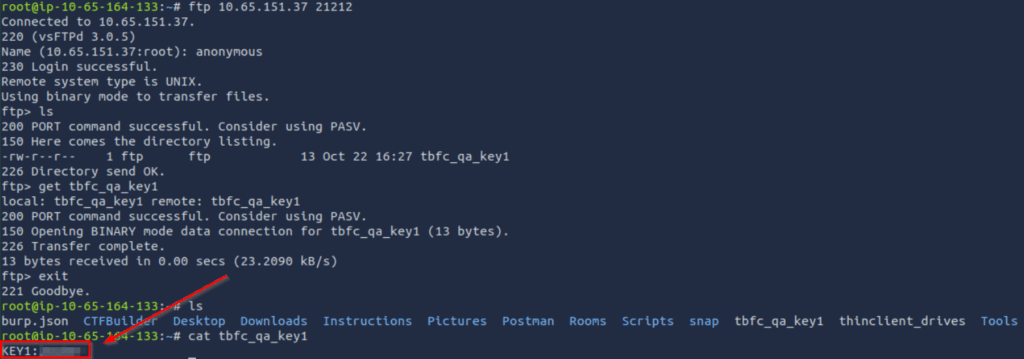
We can connect to the ftp server using the ‘ftp’ command. I then tested for anonymous login and surprise! This FTP server has no security measures in place at all. This, along with weak credential usage, is extremely common in real environments, especially those that haven’t undergone a penetration test before.
While connected to the FTP server, I used the ‘ls’ command to list its contents and found one file. I downloaded the file to my own computer using the ‘get’ command, and read the file using ‘cat’ to obtain the flag:
Answer Hint:
You need to login to the FTP server anonymously, download the file, and then read it to obtain the flag.
Question 3
What is the second key part found in the TBFC app?
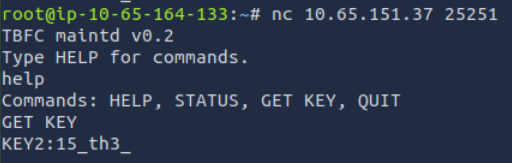
In the nmap scan shown above, we can see that nmap found an additional open TCP port (TCP port 25251). Nmap doesn’t give us any helpful service or version information, but it does show us interesting output: ‘TBFC maintd v0.2 Type HELP for commands’. I’ve never seen this service before, but it seems to indicate that we may be able to enter commands. Even without pulling this information, it’s a good idea during a penetration test to attempt to connect to unknown services using netcat.
In this case, I used netcat to connect to this port, then typed in ‘help’ to see the available commands. The ‘GET KEY’ command seemed particularly helpful for this challenge:
Answer Hint:
Login to port 25251 using netcat, then grab the key.
Question 4
What is the third key part found in the DNS records?
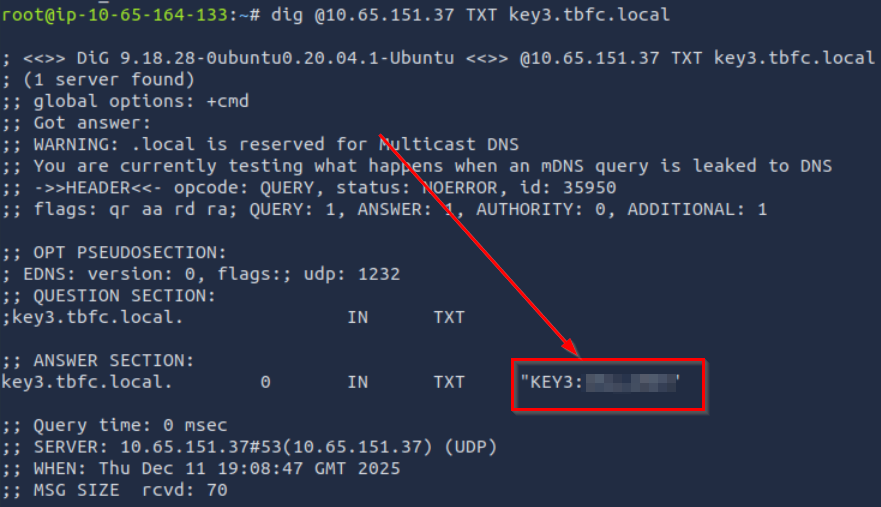
When performing a penetration test, it’s important to enumerate UDP services as well as those using TCP. DNS actually uses both TCP and UDP ports 53, with UDP port 53 being used for quick record lookups and TCP port 53 being used for larger data transfers like zone transfers. Even though TCP port 53 isn’t open, UDP port 53 is:

We are given the domain to search for (key3.tbfc.local), so we can use the dig command to grab text records as follows:
Answer Hint:
Use the dig command to get the DNS TXT records corresponding with the provided domain.
Question 5
Which port was the MySQL database running on?
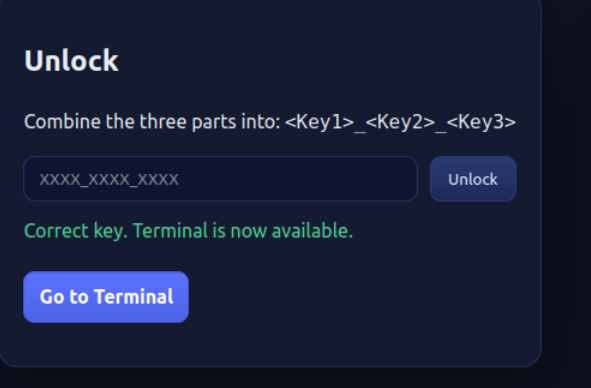
Now that we have all three keys, we can unlock access to the web server.:
We are given a web shell, which means that we can run commands on the target. One important thing to enumerate is the services that are running. While some of these services are externally exposed (the services that we were able to find using nmap), some are only available internally.
Let’s check out the output of the ‘ss -tunlp’ command shown below:
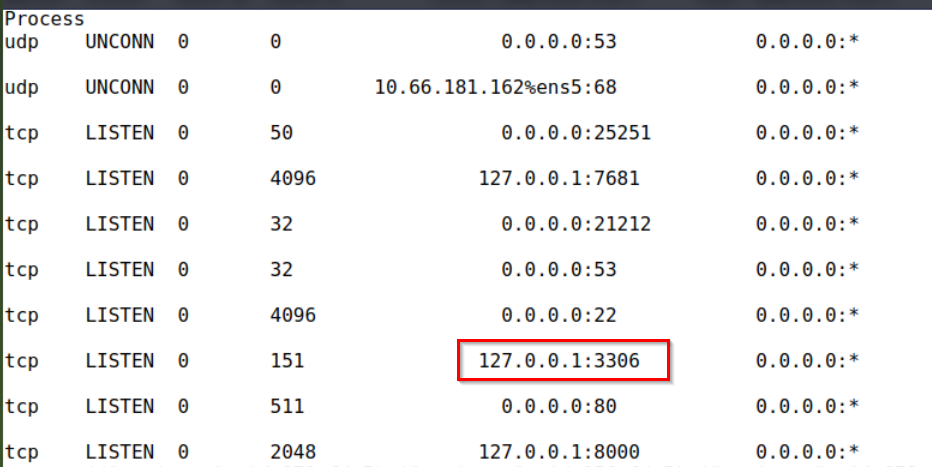
There are a few services worth enumerating that we found earlier. One is running on the default MySQL port, and the other is running on port 8000, which is often used for a web server.
Answer Hint:
What’s the default port for this service?
Question 6
Finally, what’s the flag you found in the database?
Once we gain access to a Database Management System (DBMS), we need to identify what databases we have access to. For MySQL, the syntax is ‘show databases;’ (don’t forget the semicolon!)
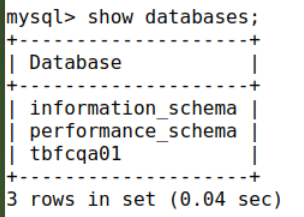
The first two databases listed are default; the third, ‘tbfcqa01’ is definitely unique. So let’s check it out. I then used the command ‘use tbfcqa01;’ to select the interesting databases, followed by the ‘show tables;’ command to see what tables are inside the database:
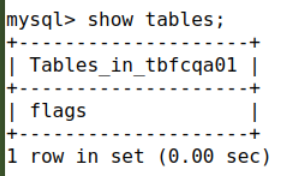
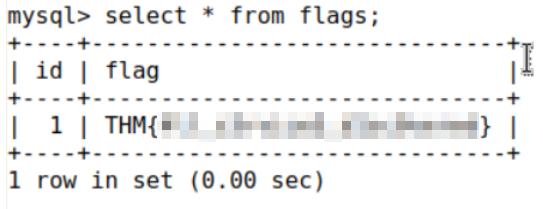
The ‘flags’ table definitely seems interesting! I used the ‘select * from flags;’ command to pull down a single entry, which is the flag we need to complete the challenge!
Answer Hint:
Gain access the DBMS and then enumerate the suspicious database to get the flag!